Google Search Console is a free tool that helps you monitor and maintain your site’s presence in Google Search results. By adding your SmugMug website to Google Search Console, you can gain valuable insights into your site’s performance in search results and identify areas for improvement. Follow this step-by-step guide to get started.
Prerequisites
- A SmugMug account
- A Google account
Step 1: Access Google Search Console
- Go to Google Search Console.
- Click the “Start now” button if you haven’t used Search Console before, or log in if you already have an account.
Step 2: Add Your Property
- In the Search Console dashboard, click on the property selector dropdown at the top of the page.
- Click on “Add property” at the bottom of the dropdown menu.
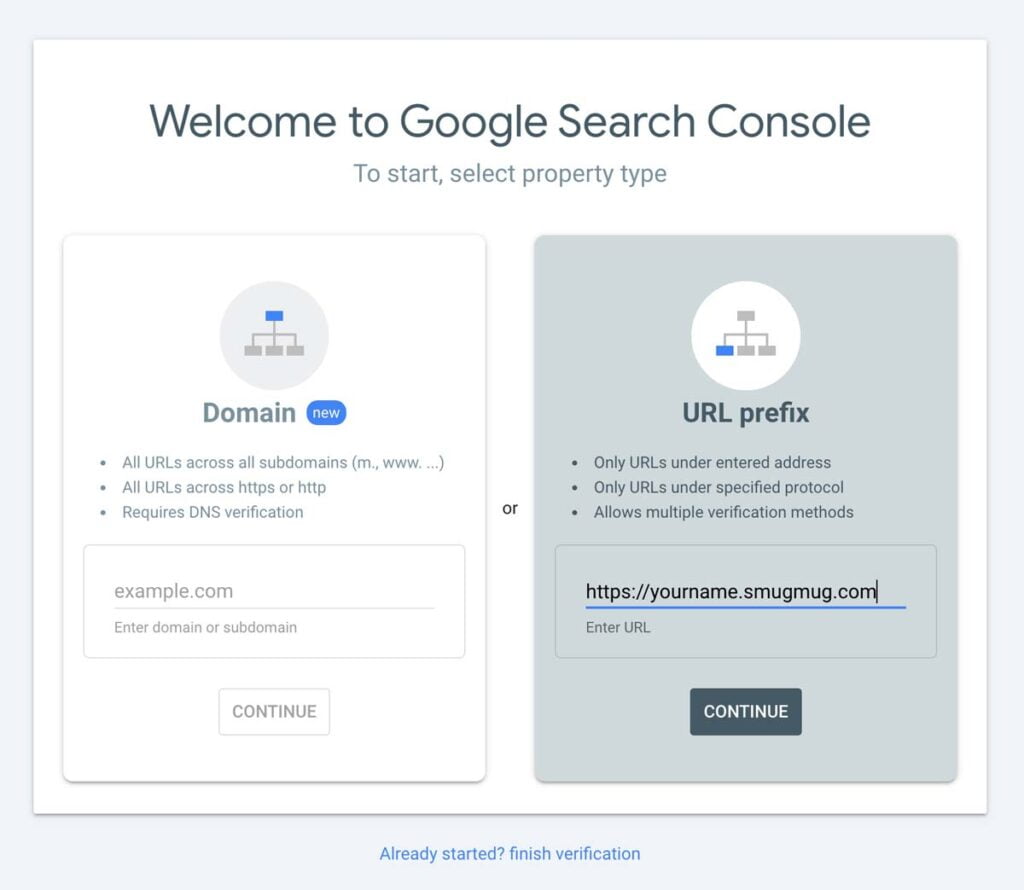
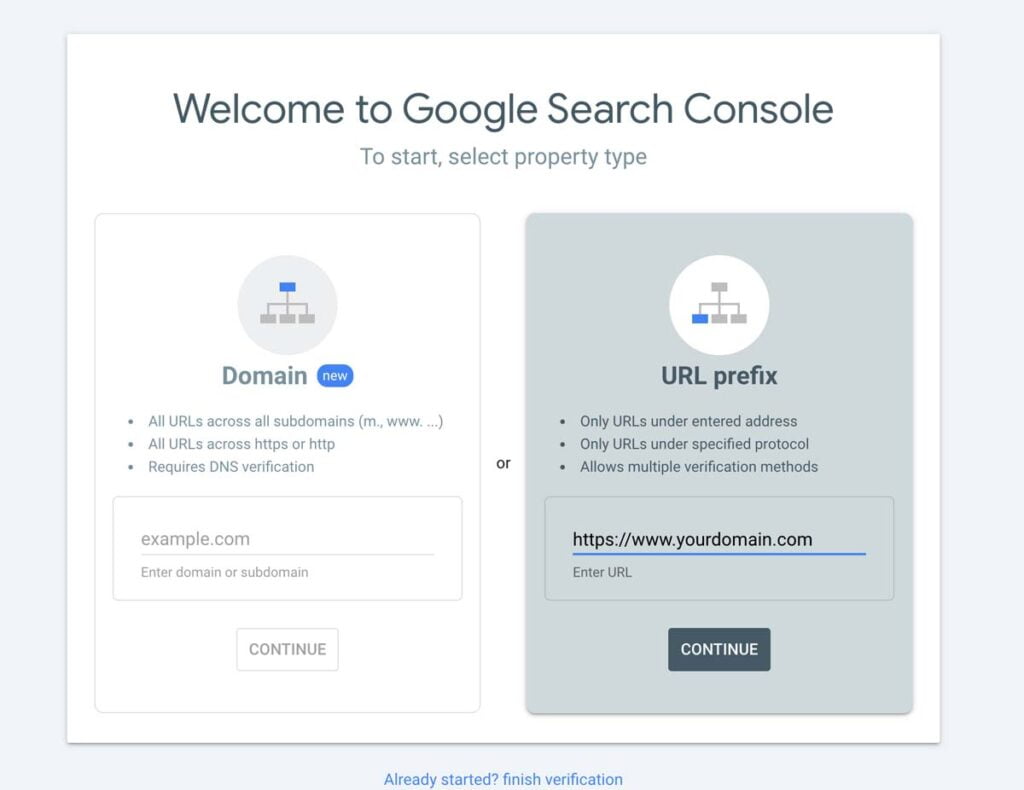
- Choose the “URL prefix” option.
- Enter your SmugMug website URL (e.g.,
https://yourname.smugmug.comor if you have a custom domainhttps://www.yourcustomdomain.com).


- Click “Continue”.
Step 3: Verify Ownership
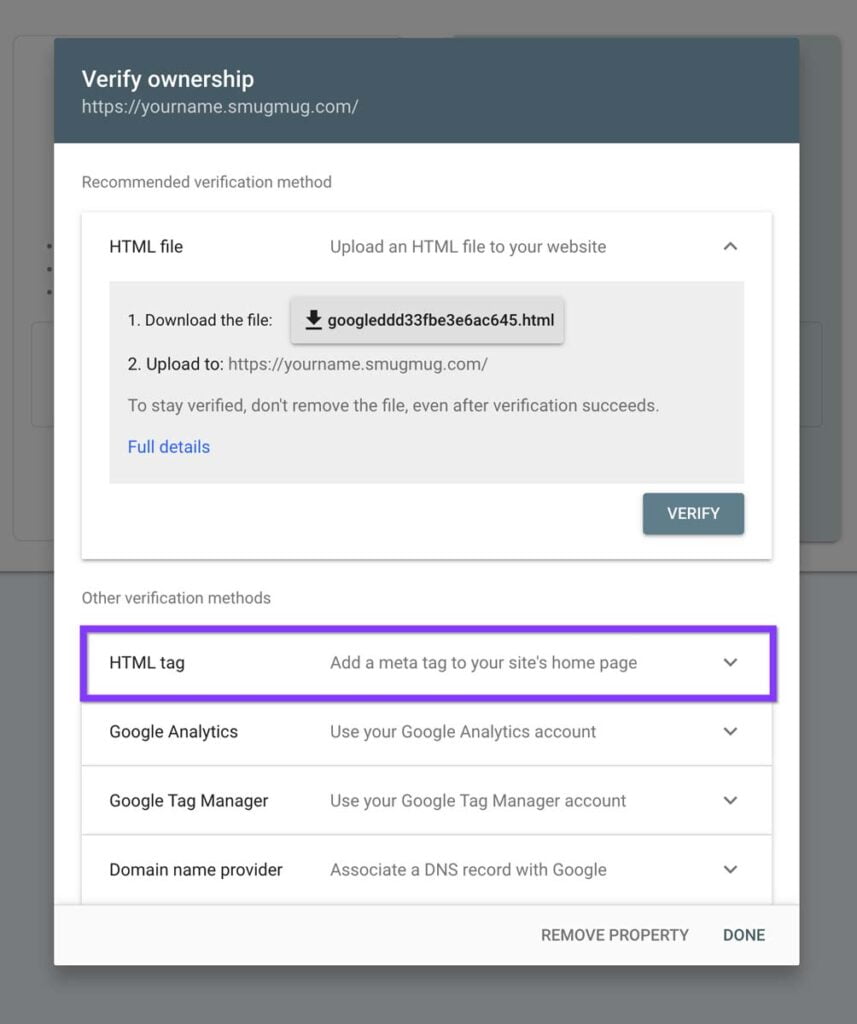
To prove that you own the website, you’ll need to verify ownership. Google provides several methods, but for SmugMug sites, the HTML tag method is often the easiest:
- On the verification page, select “HTML tag” from the list of verification methods.

- Copy the meta tag provided by Google.
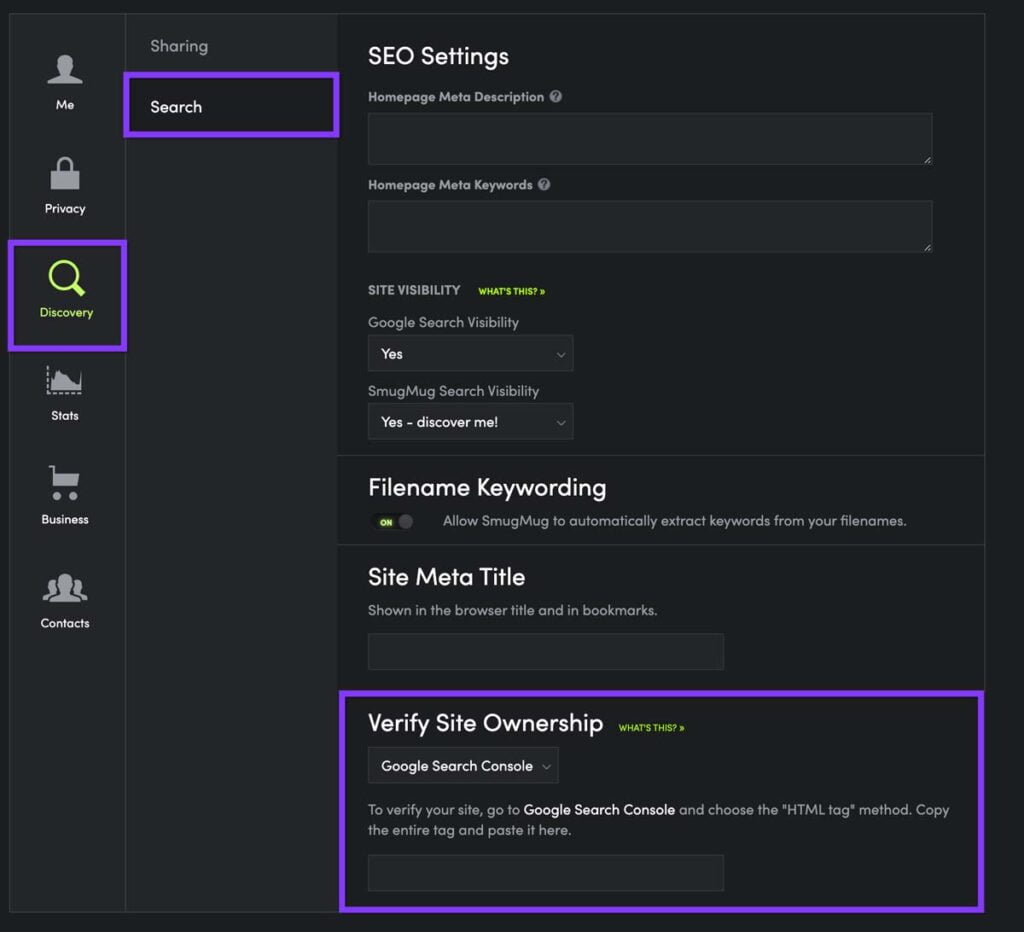
- Log in to your SmugMug account.
- Go to your Account Settings.
- Navigate to “Discovery” → “Search” → “Verify Site Ownership” → choose “Google Search Console”
- Paste the Google-provided meta tag into the exposed field.
- Save your changes.
- Return to Google Search Console and click “Verify”.

If successful, you’ll see a confirmation message. If not, wait a few minutes ( it can take up to 72 hours for the code to start working ) and try again, as changes may take some time to propagate.
Remember, it may take some time for data to appear in your Search Console after initial setup. Be patient and check back regularly for updates.
