SmugMug offers a great tool that can automatically set up your GoDaddy hosted domain, so you do not need to use the tutorial below if the GoDaddy connector worked for you.
However, if the connector did not work for you, follow this step-by-step tutorial to manually point your GoDaddy hosted domain to SmugMug.
In this tutorial, I will be pointing my old domain lgbt-stories.org to my SmugMug account to provide clear instructions for you to follow.
Setting up GoDaddy
Log in to your GoDaddy account → click on your name in the upper-right corner of GoDaddy’s homepage → choose MY PRODUCTS → this will list all the products that you have on your GoDaddy account.
Find a domain that you would like to point to SmugMug and click the DNS button:

Setting up CNAME record
Once you click the DNS button, you will see a new page with multiple records:
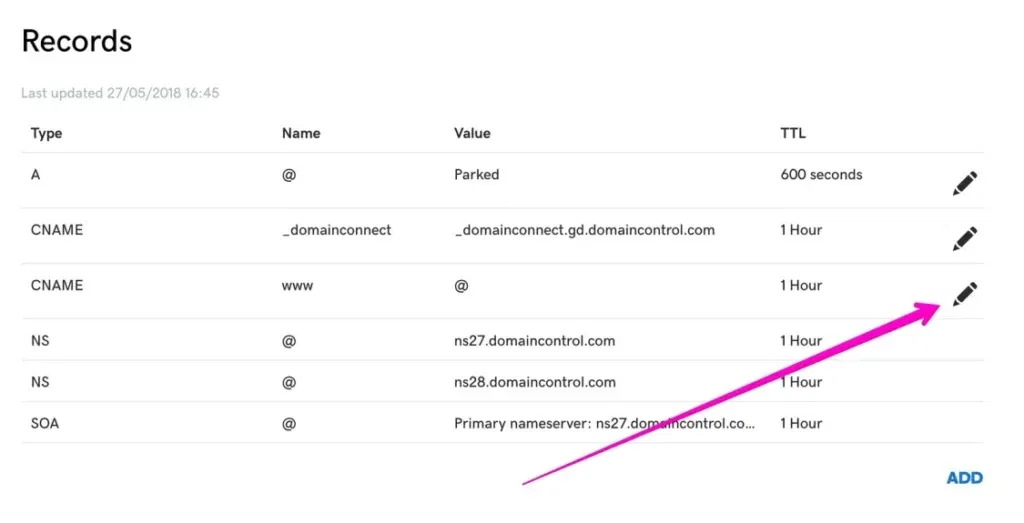
You can ignore all of the records that you are seeing, except the www CNAME record – click on the PEN icon as on my above screenshot and now, we will point this record to domains.smugmug.com

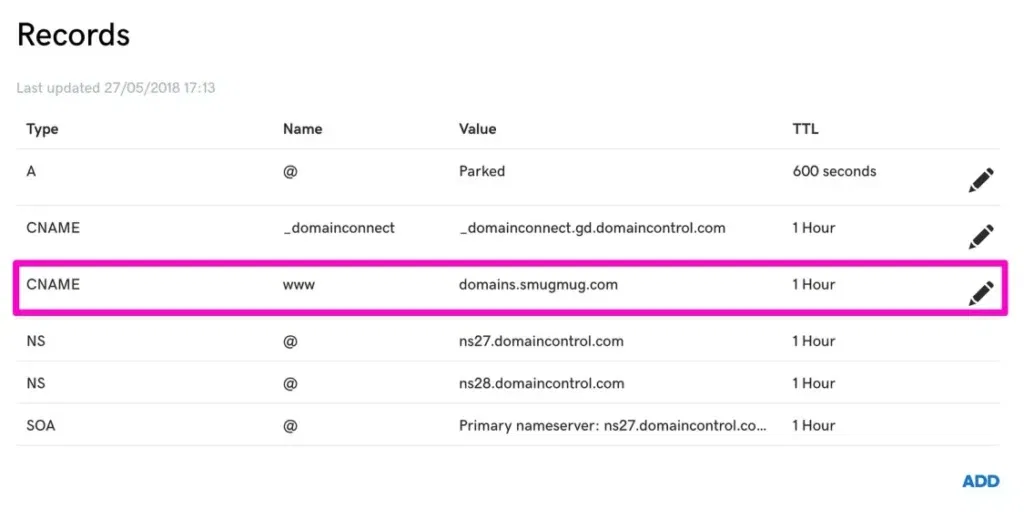
Make sure that you point your domain exactly to ‘domains.smugmug.com’ and not your SmugMug website address.
Click the SAVE button.
This is how your edited CNAME record should look like:
Setting up DOMAIN FORWARDING
In order for your domain to work with and without the www at the beginning of the URL of your site – we will need to setup a domain forwarding.
On the same page where you have set up the CNAME record, scroll down to a section which says FORWARDING:
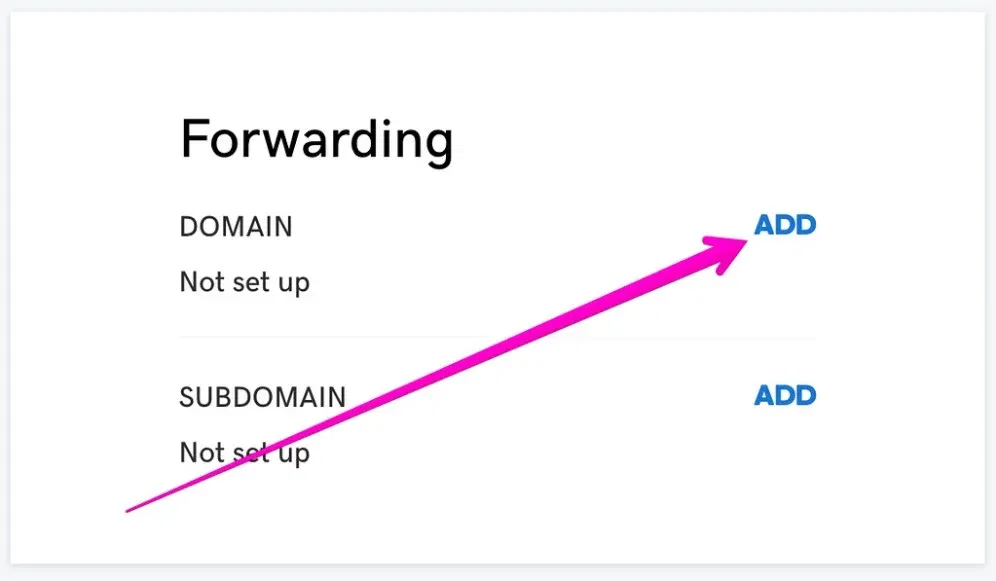
Click the ADD button and fill your boxes like this:
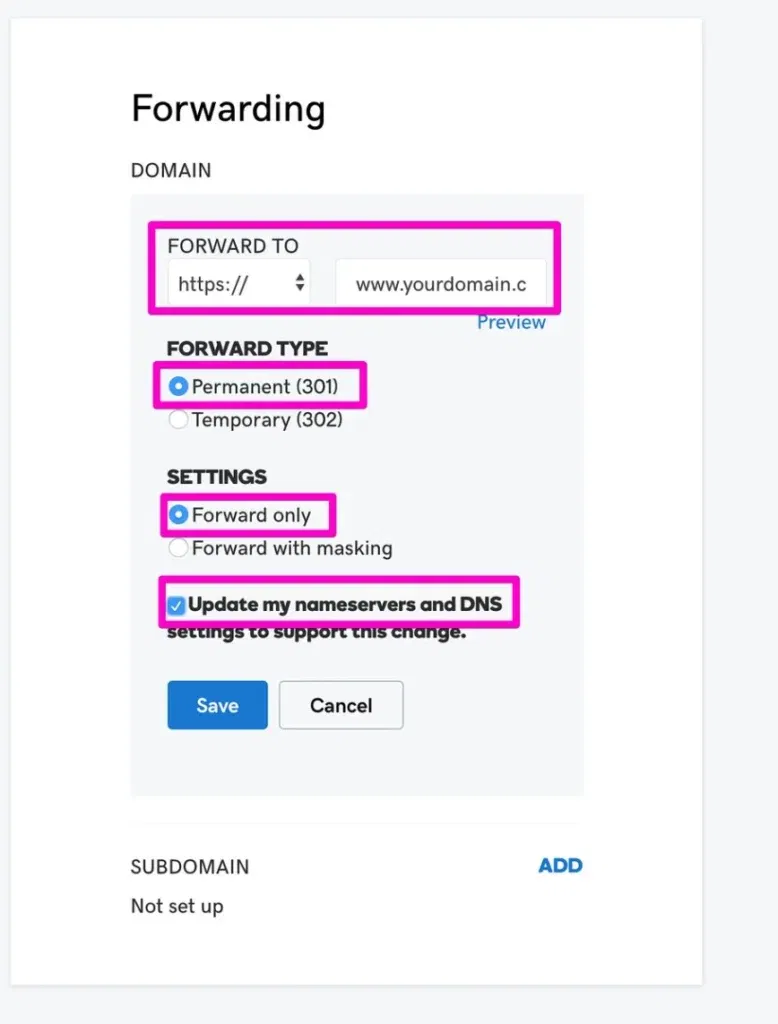
Forward To should be set to https:// and replace www.yourdomain.com with your own domain in my case I have entered www.lgbt-stories.org
Forward type: PERMANENT (301)
Settings: FORWARD ONLY
Tick the bottom option: UPDATE MY NAMESERVERS AND DNS SETTINGS TO SUPPORT THIS CHANGE.
Click SAVE.
Setting up SmugMug
Log in to your SmugMug account → open ACCOUNT SETTINGS → ACCOUNT → CUSTOM DOMAIN enter your custom domain address including ‘www’ at the beginning of the link:
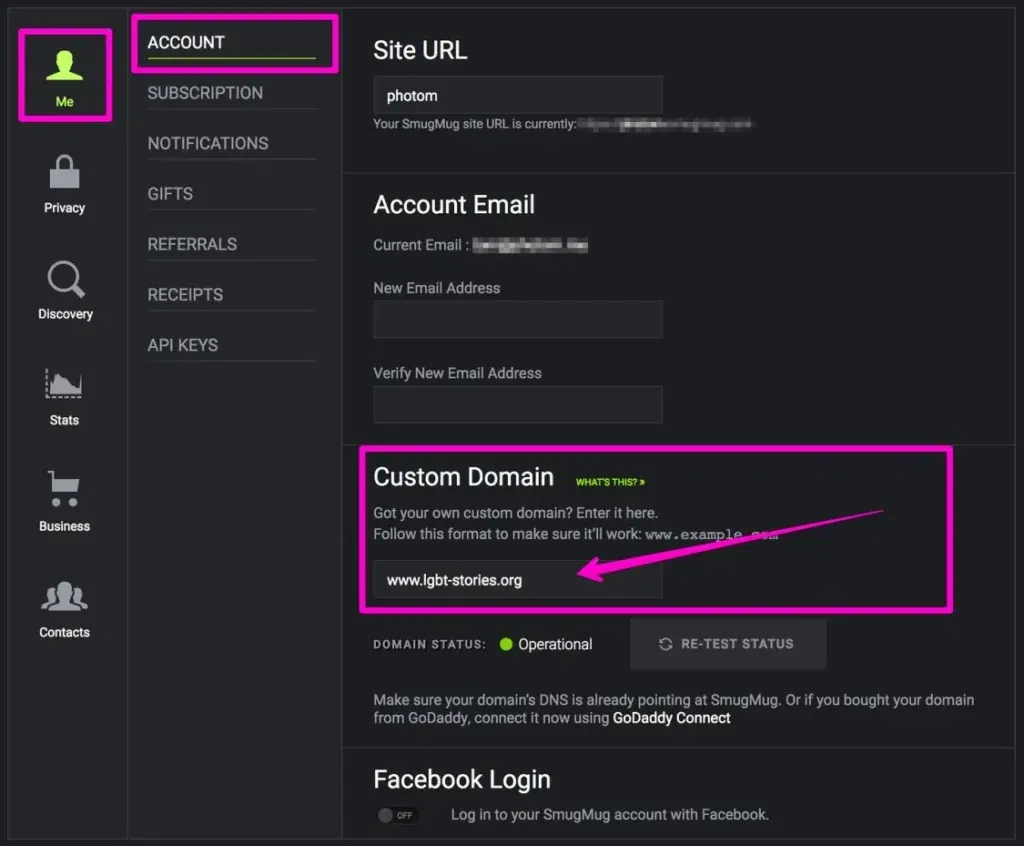
Click the SAVE & EXIT button and that is it – your domain is now pointing to your SmugMug account.
TIP!
It may take up to 72 hours for your GoDaddy domain change to propagate. So, if you see an error message when adding the custom domain to SmugMug – don’t worry, it just means that you need to give this a little bit more time { up to 72 hours }.
