How to Add a Mailchimp Newsletter Signup to SmugMug
Integrate a Mailchimp email signup form into your SmugMug website to build your mailing list and keep clients informed about promotions and new work.
Building an email list is one of the best ways to maintain relationships with clients and promote your photography business. This tutorial shows you how to embed a Mailchimp signup form on your SmugMug website.
What you'll need
- A Mailchimp account (free tier available)
- SmugMug Power, Portfolio, or Pro plan
Mailchimp's free plan allows 12,000 emails to 2,000 subscribers — plenty for most photographers starting out.
Create a Mailchimp audience
If you haven't already, set up an audience (mailing list) in Mailchimp:
- Click Audience → Audience dashboard
- Click Manage Audience → View audiences
- Click Create Audience and fill in the details
- Configure opt-in settings (double opt-in recommended for GDPR compliance)
Create an embedded signup form
- Click Create in Mailchimp
- Select Signup Form
- Choose Embedded Form from the dropdown
- Name your form (e.g., "SmugMug Newsletter")
- Select your audience

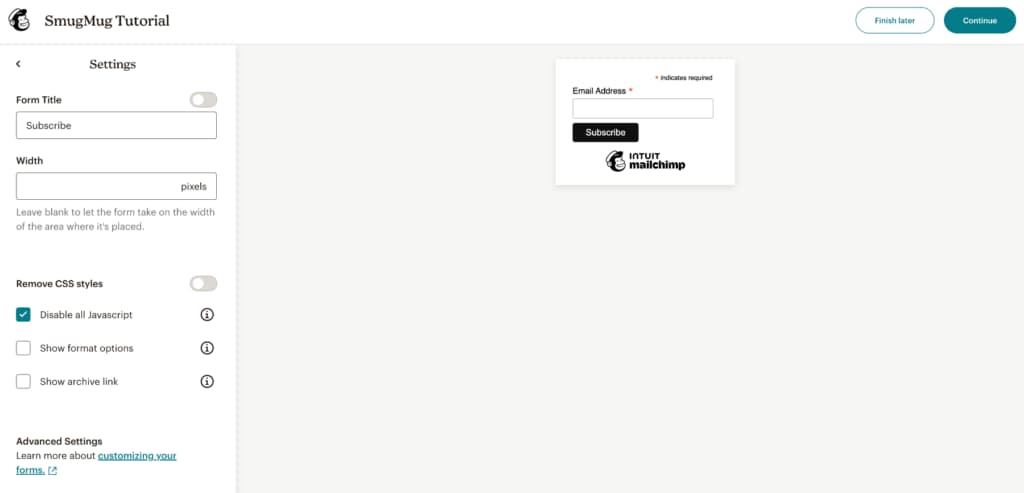
Configure form settings
Adjust these settings for best results on SmugMug:
Form Fields: Keep it simple — email only, or add first name at most. More fields reduce signups.
Settings:
- Turn OFF the form title for a cleaner look
- Delete the default width value (600px) so the form adapts to your layout
Important: Select Disable all JavaScript since SmugMug doesn't support JavaScript in HTML content blocks.
Copy the form code
Click Continue, then Copy Code to copy the HTML to your clipboard.
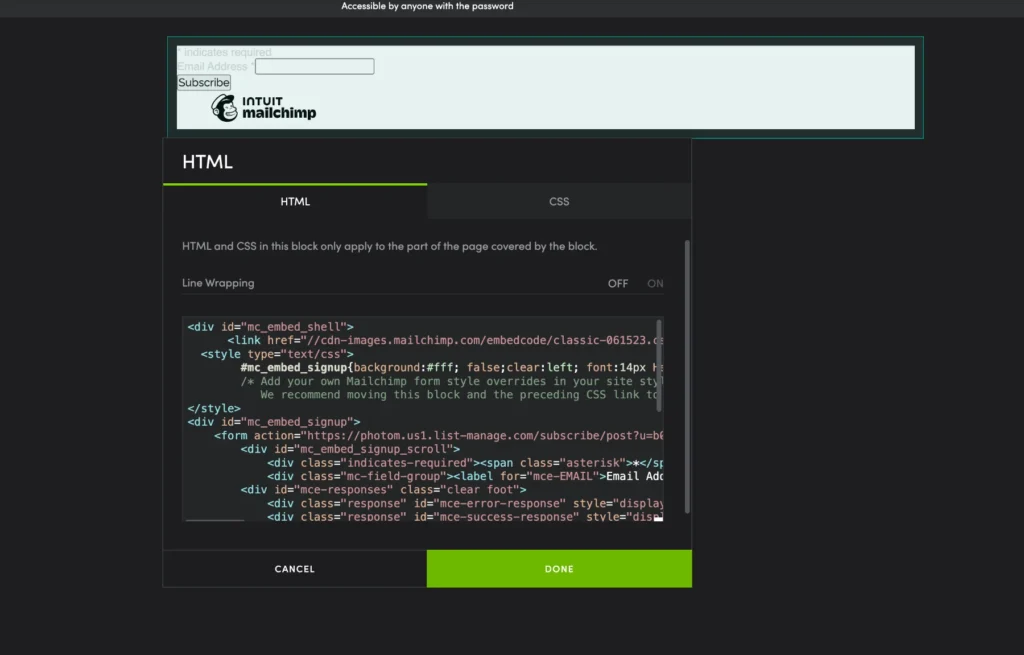
Add to SmugMug
- Navigate to the page where you want the signup form
- Click Customize Design
- Add an HTML content block
- Paste the Mailchimp code into the HTML tab
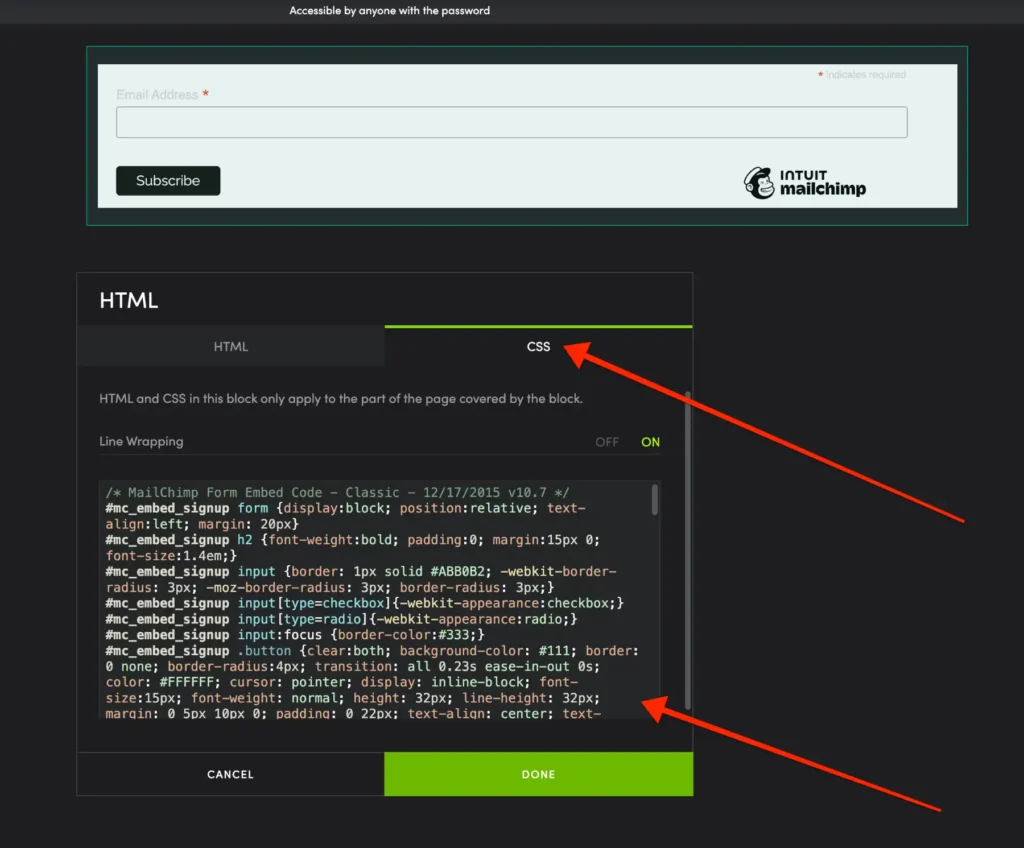
Extract and add CSS styling
The form won't look great by default. Here's how to fix it:
-
Find this line near the top of your pasted code:
<link href="//cdn-images.mailchimp.com/embedcode/classic-061523.css" rel="stylesheet" type="text/css"> -
Copy just the URL:
cdn-images.mailchimp.com/embedcode/classic-061523.css -
Open that URL in a new browser tab
-
Copy all the CSS code that appears
-
Paste it into the CSS tab of your HTML content block
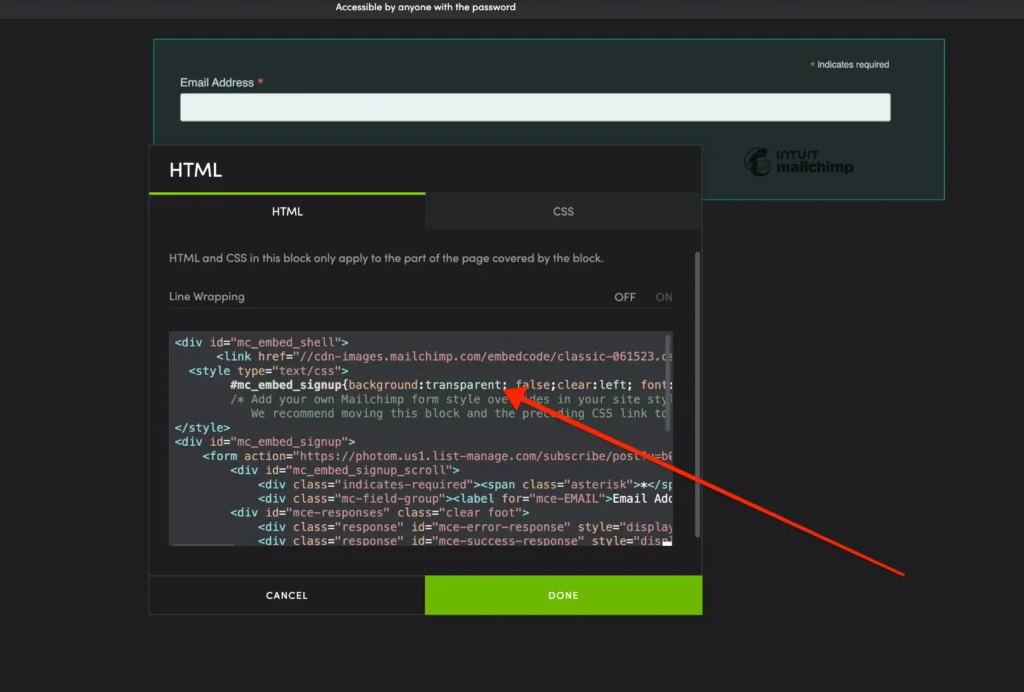
Customize for dark themes
If your website has a dark background, the white form won't look right. To fix this:
- In the HTML tab, find
background:#fff - Change it to
background:transparentor your preferred color
Customization tips
Match your site colors
In the CSS tab, modify colors to match your theme:
#mc_embed_signup {
    background: transparent;
    color: #ffffff;
}

#mc_embed_signup input[type="email"] {
    background: #333333;
    color: #ffffff;
    border: 1px solid #555555;
}

#mc_embed_signup input[type="submit"] {
    background: #0066cc;
    color: #ffffff;
}
Simplify the form
For a minimal look, you can remove the Mailchimp branding and simplify the layout through CSS adjustments.
Placement suggestions
Good locations for newsletter signup forms:
- Contact page
- About page
- Footer area (add to Entire Site section)
- Dedicated "Subscribe" page
Troubleshooting
Form doesn't submit: Make sure you selected "Disable all JavaScript" in Mailchimp settings.
Styling looks wrong: Verify you copied the complete CSS from Mailchimp's stylesheet URL.
Form too wide/narrow: Remove any fixed width values in both the HTML and CSS.
Always test the signup process yourself before promoting it. Subscribe with a test email to ensure everything works correctly.
How to Install the SmugMug Lightroom Classic Plugin on Mac
Step-by-step guide to manually install the SmugMug publish service plugin in Adobe Lightroom Classic on macOS.
How to Use the SmugMug Downloader
Download all your SmugMug photos, videos, and metadata with this free macOS app for Apple Silicon Macs.